Undoubtedly, at some point in your touring life, you’ll suffer from a flat battery and be unable to start your motorhome.
It’s something that even owners of the best motorhomes are likely to encounter at some stage. In this scenario, it really pays to have a battery booster pack ready to hand, to allow you to restart your motorhome with no dramas – that also means there’ll be no need to call a breakdown company and then potentially have to wait for hours to get help. The roads are so busy these days, response times for recovery firms can sometimes be long.
And in case you’re wondering, the number one call-out cause is a flat battery. If you can avoid being in this situation in the first place, it’s easily the best policy. Luckily, there are several ways to avoid it happening, and lots of good products to help you get on your way again, as I explain here.
Don’t miss what I have to say about motorhome weights either – they can be a source of confusion, but knowing how much your ‘van weighs is crucial.
Motorhome batteries – how to avoid a flat battery
What can cause a motorhome battery to go flat?
Motorhome battery-specific issues
How to check your motorhome’s battery
Keep your motorhome’s battery on charge during the lay-up
Booster packs versus jump leads
Where to attach the booster leads
Types of booster pack
Charge before every trip
What can cause a motorhome battery to go flat?
The most common cause of a flat battery is human error. While most modern vehicles don’t allow you to leave the headlights on, it’s all too easy to leave the sidelights or the interior light on.
Original-equipment radios tend to switch off after 20-30 minutes when the engine is off, but not all types of aftermarket radio will do this.
Some makers fit switches that allow you to select the leisure battery as a power source. But manual switches are probably going to be left in the wrong position at some point. Some 12V cab sockets also remain permanently on, so will drain the battery if you leave a phone on charge. It’s easy to leave something on and flatten the battery.
Modern vehicles are also more likely to suffer from a flat vehicle battery than older motorhomes. This might sound counterintuitive, but there’s actually some logic behind it.
That’s because the Mk 1 Ford Transit had little more than headlights and a couple of instruments in the cab, and the demands on the electrical circuit were minimal. When you switched off the key, the vehicle was fully off.
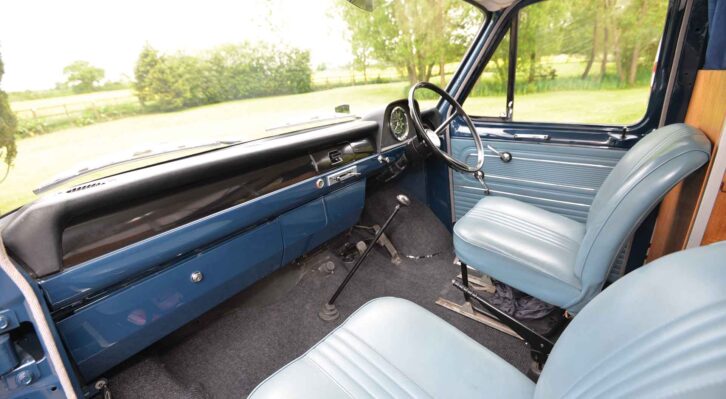
Now think of a modern Ford Transit (or any modern vehicle, we’re not picking on Ford) and the touchscreen dash, the many gauges, the alarm, the immobiliser and all of those multiple electronic sensors dotted about the vehicle that all connect to the ECU.
All of these items draw tiny amounts of electrical power, and this all adds up to a small but regular current drain. This is known rather appropriately as the parasitic or quiescent drain.
Thirty years ago, a quiescent current drain of around 50mA was deemed to be acceptable, whereas these days, that figure is 100mA.
Although battery capacities have increased and alternators have become more powerful, there is still a much higher drain on modern vehicles and they are much harder on their batteries, so the battery lifespan isn’t always as long as you’d expect.
Allowing a battery to yo-yo between high and low voltage is a surefire way to ensure that it fails prematurely. Batteries are rated by the number of lifecycles (that is, flat to full) they can withstand and every time you allow the battery voltage to get too low, you in effect use up one of your battery’s ‘lives’.
Motorhome battery-specific issues
Unlike a family car that sees regular use, the way in which many leisure vehicles are used tends to give their batteries a tough time.
Typically, they will be used for trips in summer and then more sporadically over the colder winter months – that is, if you’re not storing the motorhome.
Winter use can create a perfect storm for any motorhome battery.

For a start, battery capacity is directly proportional to temperature, so the vehicle battery already has a reduced reservoir of charge. Reduced daylight hours and lower outputs from solar panels mean that they can’t always provide much charge during the darker months.
So the battery is already operating under less than ideal conditions when you turn the key. The starter motor needs hundreds of amps to crank the engine and this takes a big bite out of the battery capacity. You then switch on your headlights, screen demist fan and heater, and demand it to stop-start at red traffic lights.
Modern vehicles also don’t have an alternator – the engine-powered recharging system – that is on all the time. To reduce the engine load and improve emissions and economy, modern alternators are ECU-controlled and flick on and off depending on the electrical load. They’re generally on more when your headlights are on, but not always. So to sum up, the winter months absolutely hammer your motorhome battery.
If you use the vehicle irregularly over winter – or worse still, just do short trips of less than 10 miles in it – and don’t always have it hooked up to the mains, the battery won’t last long. Don’t forget to make sure you know about winterising a motorhome too.
It’s not the fault of a modern battery being inferior, it’s very much down to how they’re used and cared for.
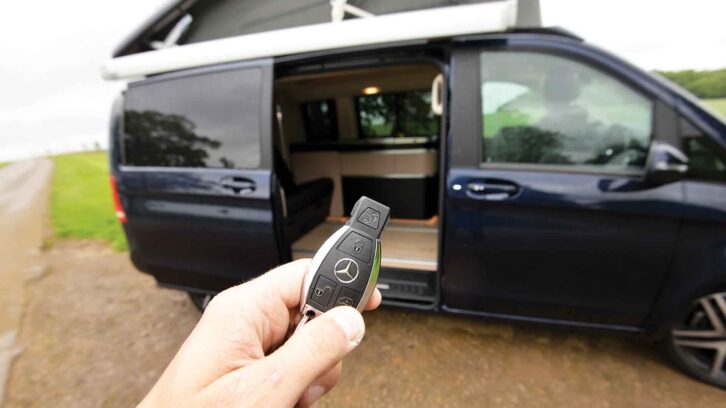
state and consumes power. So make sure to plug it into the mains supply!
One point to be aware of is that every time you press the ‘door unlock’ button on your remote key fob, your vehicle goes from ‘dormant’ to ‘get ready to go’ mode and the ECU will wake up various electrical systems (such as warming the glow plugs on a diesel engine) in preparation for the ignition switch being activated.
But if the vehicle isn’t then started, the vehicle has had an extra current drain that will reduce the battery voltage. Go in and out of the vehicle a few times over the winter and this extra current drain starts to add up – and your vehicle won’t start.
How to check your motorhome’s battery
Just £10 buys you a multimeter and they really are an essential accessory to have to hand – every motorhome tool kit should contain one. This gives you a vital second opinion on your electrical system and allows you to check battery voltage, quiescent current drain, fuses and the health of your alternator in seconds.
Built-in voltage read-outs and gauges are not always that accurate and it’s always worth doing your own separate checks to avoid misdiagnosing the problem. You don’t need to be an electrician to use one – they’re simple.
Finding your vehicle battery is the first step. These can be hidden under covers in the engine bay, under the front seats or even under the cab floor on some A-class motorhomes on a Ducato base.
Your owner’s manual will tell you where it is, or you can just Google your model of motorhome.
With the battery located, set your multimeter to ‘voltage’, rotate the dial to the 0-20V scale and measure the voltage: 12V is flat, while 12.9V means the battery is fully charged.
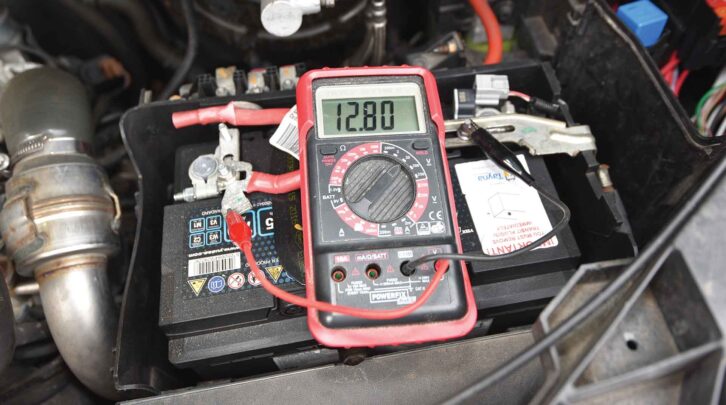
Now repeat this measurement with the engine on. When the alternator is active, this voltage will jump up to around 13.5-14.5V. If the voltage doesn’t change, you probably have a smart alternator, so try switching on the headlights – this should trigger the voltage to jump up.
If the alternator voltage doesn’t increase, no matter what you do, have the alternator checked by your local garage. They can also do a ‘drop test’ on the vehicle battery to additionally check its health.
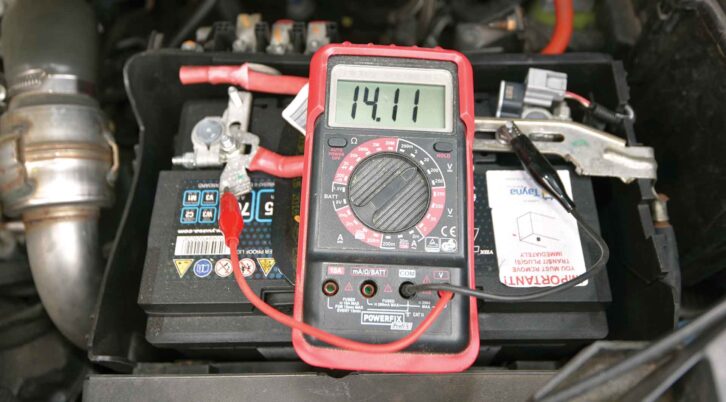
to activate the alternator). The alternator being checked here is absolutely fine
Batteries do degrade and they can occasionally appear to be in perfect health according to their voltage, but won’t sustain a load – a drop test can clarify this for you.
The other issue you tend to have with batteries is excessive drain with everything switched off, and this is called the quiescent drain.
As mentioned earlier, this needs to be under 100mA on a modern vehicle. Anything higher than that requires investigation. Before you check it, you will need to have your vehicle alarm fob handy (especially if you have an aftermarket alarm with a battery back-up) and your radio code.
With these items to hand (and all of the doors shut so the internal light is off) and your multimeter set to read amps, unbolt the black negative earth lead from the battery terminal.
The alarm might go off at this point, so you may need to retouch the lead to the battery terminal or switch the alarm off on the remote fob.
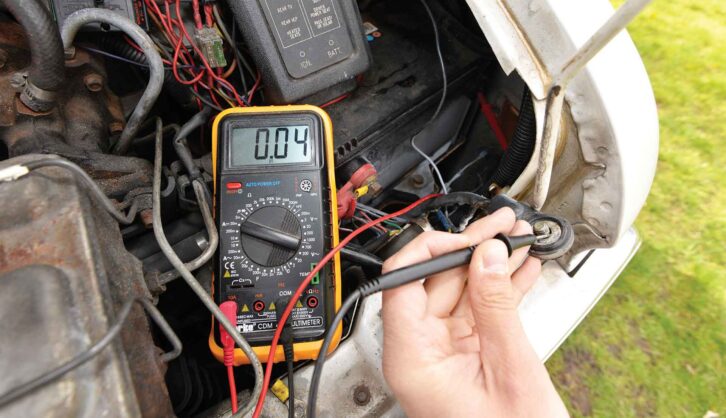
Now touch one of the multimeter probes to the battery terminal and the other to the end of the cable that you have just removed. Make sure you don’t touch the probes or you’ll affect the readings because of your skin’s resistance. If the current is more than 100mA, you’ll need to find out why.
The normal method is to pull vehicle fuses one at a time and re-read the voltage, until the high-drain circuit has been found.
With the earth lead removed, there’s another important thing to check: the earth strap itself. To reduce the amount of vehicle wiring and save on cost and weight, the vehicle body on modern vehicles is connected to earth.
So everything metal on the vehicle will carry a negative current. But the earth connection is only as good as the earth lead. These can often break down with the passage of time, fray or degrade, and this can increase the resistance of the cable and reduce the voltage flowing in the system.
Corrosion can form in layers under battery leads and this can have an insulative effect and increase the resistance, reducing the available voltage in the system.
This can cause warning lights to flash erroneously, poor starting and battery leads to get hot. So it’s worth checking.
With the multimeter set to ohms (usually denoted by an upper case omega symbol), touch one probe to the battery end of the earth lead and the other to a nearby unpainted bolt head on the engine or bodywork.
This is now measuring the resistance of that earth lead. It should be close to zero. If it reads anything higher than a couple of milliohms, remove the earth lead and clean its connection on the chassis with abrasive paper or wire wool. It’s a good idea to add a second earth lead – Halfords sell them and you just bolt it between the negative terminal on the battery and a bolt head or stud.
Keep your motorhome’s battery on charge during the lay-up
If you want to maximise the life of all the batteries in your motorhome – including the best campervan leisure batteries – make sure you keep your vehicle charged up when it’s not in use.
Most modern motorhomes will also charge your vehicle battery, but not all, so it’s worth checking this in the owner’s manual or by measuring it yourself. It’s easy enough to check it with a multimeter.
Measure your vehicle battery voltage. Now plug your vehicle’s electrical hook-up lead into a mains source. After a couple of minutes, measure the vehicle battery voltage again.
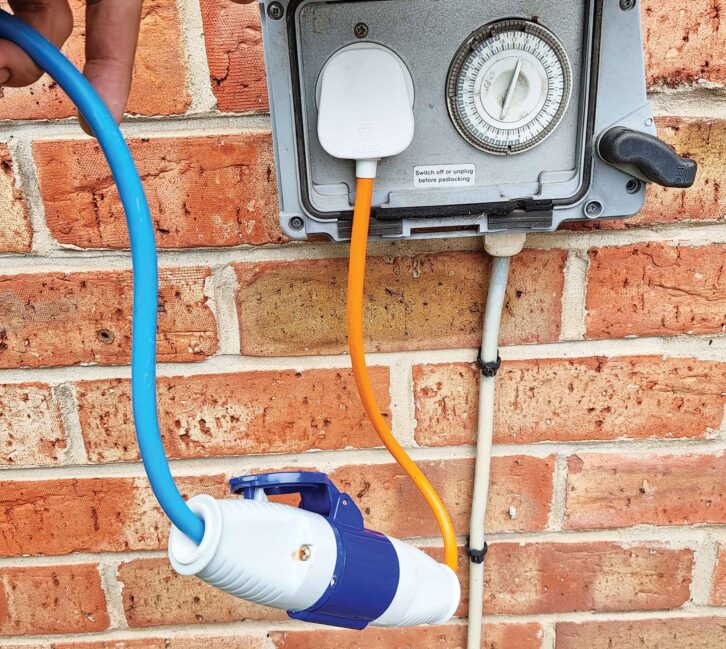
If it hasn’t changed, it’s not being charged – check if there is a setting to charge it on your leisure battery control panel or mains charging unit. Sometimes there is a switch to move or a setting to alter.
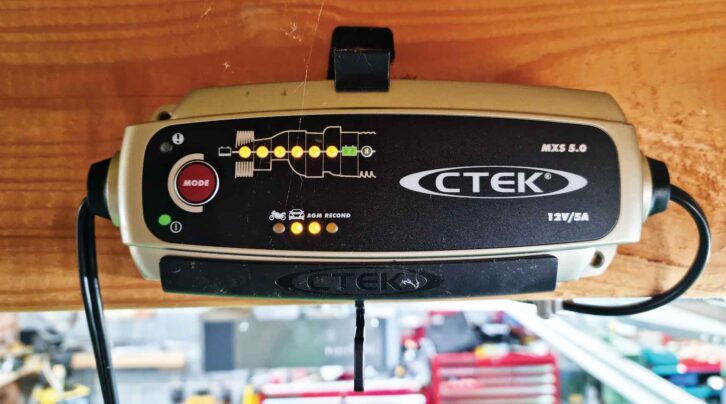
If your vehicle’s main habitation charging system doesn’t also charge the vehicle battery, there are a number of possible solutions. You can simply connect a battery conditioner (for example, a CTEK model) directly to the battery terminals, but it can be a bit of a pain to have to lift the bonnet and remove panels.
A possibly easier solution is to add a charging unit, such as the Battery Master from Van Bitz (the easiest item to wire in, and fully waterproofed) or products such as Sterling’s Auxiliary Battery Charge/Maintainer.
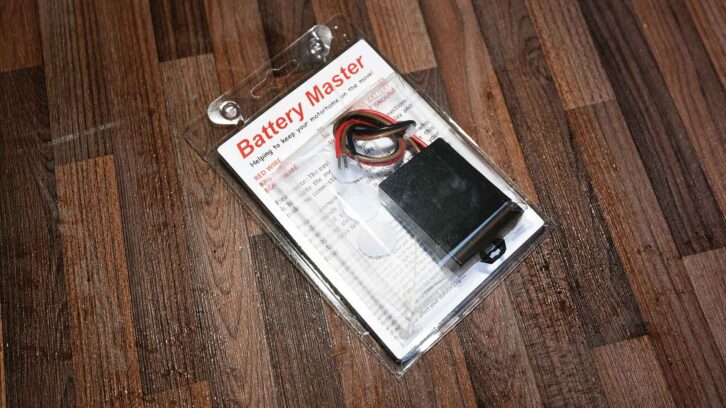
it’s wise to add one. A Van Bitz Battery Master costs around £70 and involves a simple three-wire fit
These devices work automatically to pour excess charge from your leisure batteries into the vehicle battery when you’re on a hook-up.
They only work in one direction (that is, they won’t drain the vehicle battery while you are using habitation kit) and can take power from mains, solar or a battery-to-battery charger.
We’re big fans of automatic systems – anything involving human intervention is prone to forgetfulness! Even with an automatic system fitted, it’s still worth having a portable battery conditioner as a back-up system, which can then be used to recharge any of the family vehicles that need topping up.
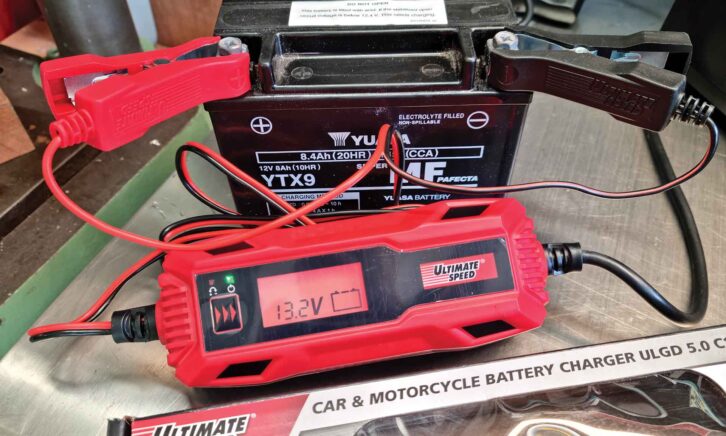
A battery conditioner is a gentler way to add charge than using a battery booster and better for long-term use. You can get one for as little as £20, but you might want to invest in a slightly higher-quality model, for example from Halfords, Ring or CTEK.
Booster packs versus jump leads
So now we’ve outlined the issues with flat batteries and how to prevent them, what can you do if you still suffer a flat?
Well, this is where a battery booster pack is the best thing to go for. These are a relatively new invention and are easier to use than jump leads.
The big problem with jump leads is that, unless you fancy lugging around a 20kg battery, you’ll need to get a vehicle close to your motorhome.
This isn’t always easy, because most consumer leads are not that long and the battery isn’t always under the bonnet in a convenient place.
Getting two vehicles close together – especially motorhomes – is rarely simple and risks potentially causing damage. It’s all too easy to clip the door on another vehicle or dent a panel.
Cheaper jump leads – especially those designed for small cars – tend to use thin-gauge wire and are often too short for motorhomes. They can become hot while working and can be a bit of a pain to use. If you’re not careful, you might also attach the wrong leads and cause a spark or a short.
With a standalone booster pack, you don’t need to use another vehicle. They are more compact than jump leads and very much designed for anyone to use them, with all sorts of electronic protection built in, such as reversed polarity. In my opinion, they’re safer and simpler to use, and highly effective.
Where to attach the booster leads
This bit is very important. Read the procedure in your owner’s manual. Attach the leads in the wrong place and you risk causing damage. So always check in your owner’s manual.
Do not be tempted to reach for your phone to take advice from forums or social media – the information you’ll find there is of variable quality.
Usually, the booster pack leads are attached by connecting the red positive alligator clip directly to the positive battery terminal, and the negative lead to a bracket on the engine or a stud on the bodywork.
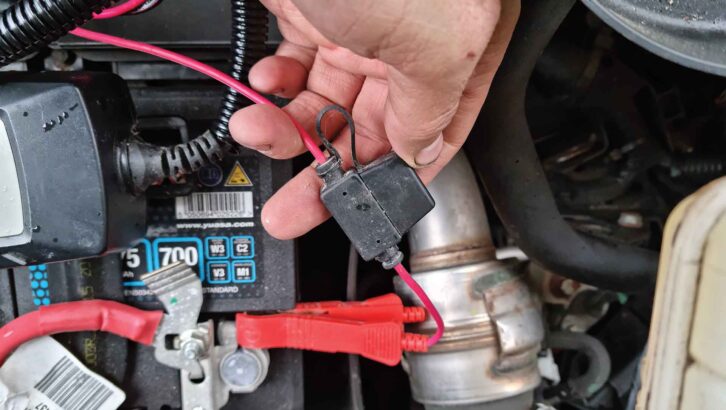
These days, many manufacturers fit dedicated battery jump start points on the bodywork, so use them (you sometimes have to lift up a plastic cover to access them).
Most booster packs have built-in polarity protection, too, so if you accidentally connect the leads the wrong way around, no harm will be done. A display screen or coloured LEDs will usually illuminate to tell you if anything is wrong.
If an error is shown, try repositioning the alligator clips as a first step – they will need a good contact to ensure maximum current can flow.
Types of booster pack
Over the years, we have tested lots of different booster packs and the most common ones you’ll find are the cheap, unbranded models available online.
These start from £30 and while some of them do work and are better than nothing, they might not last long. I’ve had numerous models fail in use, so they’re a bit of a lottery.
When you reach for a battery booster pack, it’s often because you really need to use it and it’s an emergency, so for this reason, we would always suggest paying a bit more for a branded item from firms such as Halfords, Machine Mart or a UK motorhome supplier.
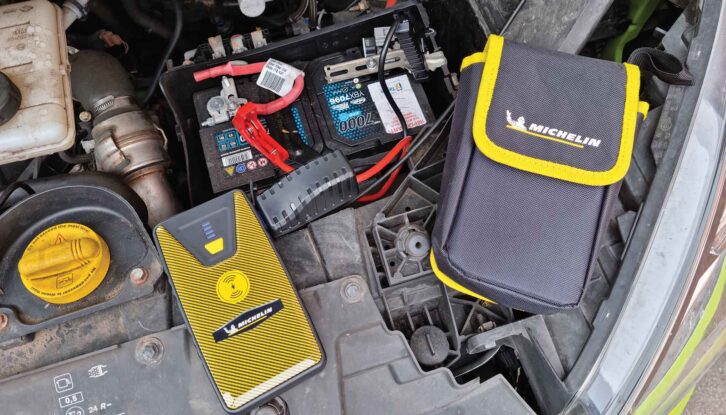
Names such as Halfords’ own brand, Noco and SIP are among the ones to go for and it’s best to only buy lithium battery models – some of the older, bulkier nickel cadmium models are still sold (often in large cases with built-in air compressors), but I prefer the former.
The larger the capacity of lithium battery, the more jump starts the pack can make between recharges and the larger an engine it can start.
For most motorhomes up to three litres, a 12V 1000A-rated pack will suffice, but the bigger the amperage, the better. The size of motorhome can make a difference too – if you have a larger A-class or an RV based on a coach, you might need a more specialist 24V commercial unit – ask for recommendations from the maker in this case.
Having had one of the cheaper units fail and another die prematurely, I finally bit the bullet and upgraded to a Noco GBX75, offering up to 2500A of current – more or less enough to restart a planet!
It’s not cheap, but it is fantastic. It can power a phone for a very long time in an emergency, but it’s far too bulky to be convenient as a portable phone battery bank.
These are the units that motorhome dealers use (and they have to deal with flat batteries on a daily basis), so that should tell you something.
Models such as the Noco GBX45 1250A start at £131 from Halfords and should be the minimum-sized unit to consider for a diesel motorhome.
If the battery is really flat – under 5V, say – a booster pack won’t always work and you might need to connect a mains charger directly to the battery for a couple of hours to increase the voltage. If the booster pack doesn’t get the engine started, it’s wise to ring a breakdown firm, because there might be another electrical issue present.
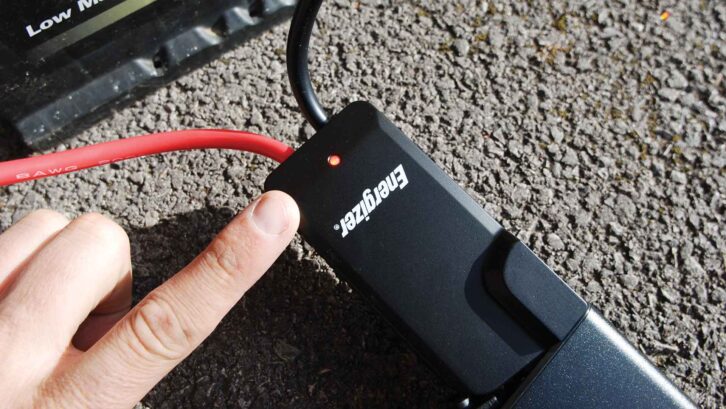
Some booster packs have an override button that allows them to be used in higher boost settings, which might be able to start a vehicle, but they can’t be left connected while you drive off.
With any booster pack you buy, it’s worth doing a dummy run on it to check you can physically fit the alligator clips on the battery terminals (or charging posts) on your particular vehicle. Depending on the access to the battery, you might struggle to attach the booster pack leads – this is a rare occurrence, but it’s better to know before you need to use the unit in an emergency.
If the booster pack leads are not suitable, try a different brand. For this reason, it’s wise to only buy from a UK retailer (although Amazon’s returns policy does make things easy) and stick to well-known brands.
Charge before every trip
There is nothing more useless than carrying a flat battery booster pack around with you, but this is one of those things that is easy to let slip – they’re invariably shoved into a glovebox and forgotten.
So before every big trip, make sure yours is charged up or add it to your usual packing list so you don’t forget to take it when you’re loading a motorhome. If the booster has been used, get it recharged as soon as possible when you’re next on a mains hook-up and don’t store it flat. Like all batteries, they don’t last as long if they’re stored in a discharged state.
The verdict
There’s no downside to carrying a battery booster pack and it can be a real time-saver if you have a flat battery. And if you’re in France on a Sunday afternoon, it can save you having a potentially long wait for a breakdown lorry (trust us on this one!). Spend about £100 on a good branded unit and you can avoid a lot of issues and have peace of mind.
Don’t miss what I have to say about getting motorhome power off-grid too, where I share the gadgets that are well worth investing in if you’re a regular off-grid tourer.
Future Publishing Limited, the publisher of Practical Motorhome, provides the information in this article in good faith and makes no representation as to its completeness or accuracy. Individuals carrying out the instructions do so at their own risk and must exercise their independent judgement in determining the appropriateness of the advice to their circumstances and skill level. Individuals should take appropriate safety precautions and be aware of the risk of electrocution when dealing with electrical products. To the fullest extent permitted by law, neither Future nor its employees or agents shall have any liability in connection with the use of this information. Double check any warranty is not affected before proceeding.
If you’ve enjoyed reading this article, why not get the latest news, reviews and features delivered direct to your door or inbox every month. Take advantage of our brilliant Practical Motorhome magazine SUBSCRIBERS’ OFFER and SIGN UP TO OUR NEWSLETTER for regular weekly updates on all things motorhome related.
Leave a Reply