Anticipation is half the pleasure. For motorhomers who choose not to tour all year, the quiet months before the summer season properly kicks off are filled not with inactivity, but a growing sense of excitement.
Recommissioning a motorhome – checking, cleaning, testing and preparing – is not simply house-keeping, it is part of the pleasure. This reassuring process builds confidence in both your campervan and its accessories.
Get this preparation right, and you reduce stress, avoid costly surprises and ensure that every trip begins with quiet assurance, so you can look forward to pitching up at one of the best motorhome sites.
Here’s a comprehensive guide that combines best-practice advice from industry experts, and real-world experience.
1. Start with a full visual inspection
Before grabbing your bucket or plugging in a charger, begin with a slow, methodical walkaround check. Look for obvious things: damage, cracked seals, perished mastic or the signs (and smells) of water ingress.
Check that your vents and gas dropouts remain clear and intact. Rodents are opportunists, so inspect wiring, insulation and upholstery for signs of nibbling.
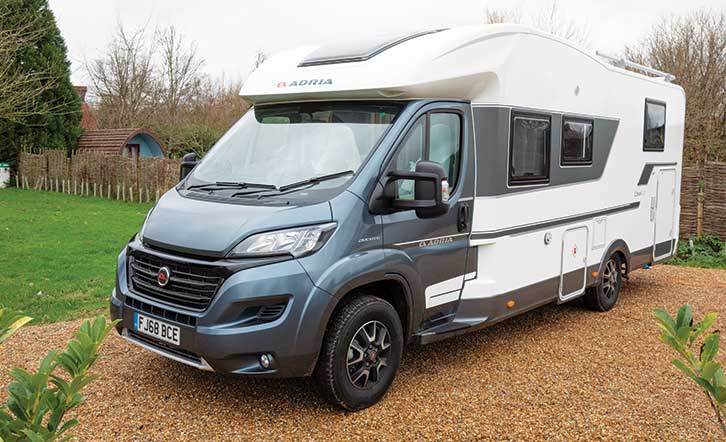
Windows and rooflights demand extra scrutiny, especially on older vehicles where seal fatigue and failure can develop unnoticed.
This initial inspection sets the tone; it tells you whether the campervan has wintered well, or whether further attention is required before starting the preparation jobs.
2. Clean the exterior properly
A thorough exterior clean is both cosmetic and preventative maintenance. It’s surprisingly therapeutic, too, but cleaning a motorhome is a big job, so pace yourself!
Begin with a low-pressure rinse to soften grime. Avoid jet washers, which can force water past seals and behind graphics. Pre-soak the ’van, then use the best motorhome cleaner and a soft brush, paying attention to resilient black streaks and any grime accumulated during the winter.
Resistant black streaks may require a specialist cleaning fluid – we’ve found Muc-Off Bike Cleaner (£8.99/litre, formerly Caravan Cleaner) is good for this job.
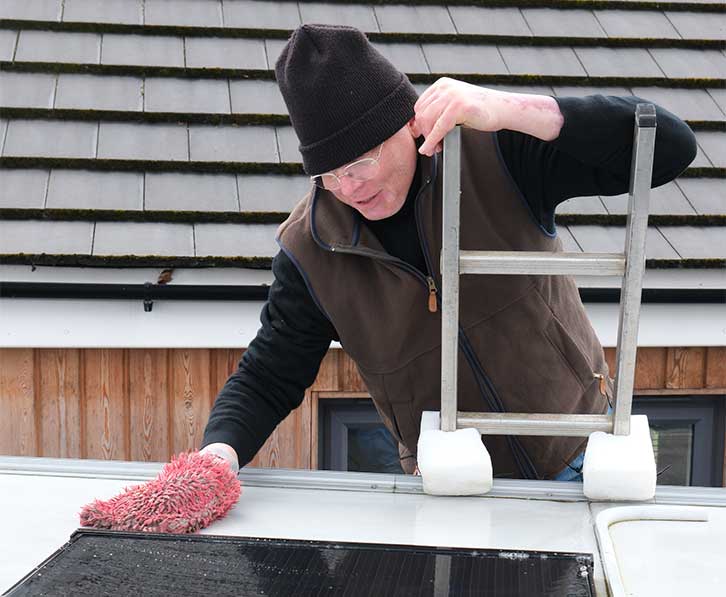
While it can be a task that is neglected, you should clean a motorhome’s roof annually using a stepladder and a long-handled brush. If you lean a normal ladder against your ’van, make sure you protect the panel edges from damage. We would recommend never walking directly on the vehicle’s roof.
Once rinsed, dry the ‘van off and consider polishing the motorhome. Alternatively, top-up your ceramic coating (Diamondbrite/PaintSeal) if it has it. It may also pay dividends when you come to sell your ’van on.
If your motorhome has had a paint-sealant treatment in the past 12 months, a simple rinse may restore its gloss finish.
3. Give the interior a spring clean
Months in storage can leave interiors stale, dusty or, worse still, colonised by insects or rodents. Open lockers, lift cushions and inspect corners, carefully, especially around wheel arches. If the motorhome fridge has been closed all winter, open it up for a few days. And always remain vigilant for early signs of damp. Some motorhomers move upholstery and cushions inside during winter storage.

Once you’re satisfied, a comprehensive clean is all that’s required, so it’s time to reach for the best motorhome vacuum cleaner and your other cleaning products.
Protecting upholstery and carpets with suitable fabric treatments can pay dividends throughout the season, particularly for family motorhomes. Always ensure that there’s good ventilation during and immediately after cleaning.
4. Check your leisure battery’s health
The leisure battery is the silent backbone of your motorhome’s electrical system. If left unattended over winter, its condition can deteriorate significantly.
Ideally, it will have been maintained with a smart charger, but if not, now is the time to give it a health check.

Use a multimeter to measure resting voltage – they can be a very useful campervan gadget to have. Around 12.6V or higher indicates full charge, while anything below 12.4V suggests deep discharge, and could cause potential long-term damage.
Check and charge both your vehicle and leisure batteries several weeks before departure, then monitor whether they hold their charge.
5. Check gas supply and hose condition
Check cylinder levels and confirm hoses are in good condition and within their service life, typically five years from manufacture. The date of manufacture should be printed on the side of the hose. Cracked or ageing hoses should be replaced immediately.

A quick test of regulators and connections ensures heating and cooking systems will operate faultlessly.
These gas supply tasks are best done by a trained professional, ideally as part of your annual habitation service.
6. Flush and sterilise water system
Dedicated tank cleaners, such as Puriclean or Pro-Kleen, will have instructions on the correct concentration. Fill the fresh tank with it, then turn on the water system. Go to the tap furthest from the tank and turn it on until the water runs through, then cut it off.
Do the same for all of the taps in the system. Leave the system primed like this for however long the instructions suggest. After that, run the system to drain the cleaning solution.

Fill the tank with fresh water and run it through every tap until you can no longer smell the solution. This also deodorises the grey tank. Empty that afterwards!
See our guide on how to clean the waste water tank in a motorhome.
7. Refrigerator recommissioning
If the fridge has been stored correctly with the door ajar, recommissioning should be straightforward. Clean interior surfaces using a mild bicarbonate solution, then rinse and dry thoroughly. Vinegar can be used to eliminate mould spores if necessary.

Once clean, test the fridge on mains, 12V and gas modes. Confirming full operation before your first trip prevents the disappointment of discovering faults only after arrival on site! For stubborn smells, consider buying a fridge odour absorber.
8. Check your brakes
It’s now time to take a look at your motorhome brakes.
Take your ’van for a short test drive. Release the handbrake and pull away gently. You might get some hesitancy, as if it is still being applied, but typically, it will release as the vehicle moves. Reapply and release the handbrake a few times to assess whether it is working correctly.
Any signs of it not releasing or applying as it should will require further investigation by the professionals.

If that all seems good, a short road-test drive should be sufficient to clean light surface rust from the brake discs.
Note that anything that doesn’t feel quite right should always be referred to your regular workshop.
9. Clean your blades
Don’t forget to clean your motorhome windscreen.
You can buy expensive chemicals to clean wipers, but a cheap, effective solution is a 50/50 vinegar and water mixture, which will cut all but the nastiest gunge. Get a cloth, give a few long squirts of the mixture onto it, then draw the cloth along the length of the blade.

Repeat until the cloth is left clean. Ensure you dry the wipers thoroughly, to prevent vinegar being left in contact with the blades for an extended period.
10. Check appliances and safety equipment
Before the first trip, fire up every onboard appliance: heating, oven, water pump, fans and lighting circuits. Confirm they operate on all relevant power sources.

Replace batteries in smoke alarms and carbon-monoxide detectors, and check fire extinguishers remain in date.
This systematic approach ensures that comfort systems perform flawlessly when touring begins in earnest.
11. Awning and outdoor equipment inspection
Awnings stored damp can develop mildew and unpleasant odours. Erecting your awning at home before the season begins allows time for airing, parts-checks, inspection, cleaning and reproofing if required. This also applies to wind-out awnings – roll yours out to give it a thorough check before you hit the road.

Next, take a look at any gazebo, groundsheet and camping furniture – small details that contribute significantly to overall touring enjoyment.
12. Bulk supplies and essentials
Stocking up on essential consumables such as the best motorhome toilet chemicals, flush additives and cleaning fluids now can offer worthwhile savings this season.
Relying on campsite shops often means paying premium prices, so planning ahead is both economical and convenient.
Organising supplies in advance also speeds packing and reduces last-minute stress.
13. Documentation, servicing and insurance
Confirm your motorhome’s service history and MoT are up-to-date, insurance valid and any tracker subscriptions and club memberships are renewed. Overlooking paperwork can invalidate warranties or leave valuable assets inadequately protected.
Scheduling a professional service (both habitation and base vehicle) before peak season can also provide reassurance that hidden technical issues are addressed.

We recommend using an NCC-approved service centre or technician for this.
14. Water pumps and heating
Recommissioning extends to functional testing of pumps, heaters and electrical distribution systems. Run fresh water through pumps, check for leaks and ensure heaters operate efficiently.
Alde wet heating systems should be checked for correct fluid levels and service intervals, as glycol degrades over time. Verifying these systems will ensure warm showers and reliable heating when the weather turns.
15. Final road test and driving assessment
Once preparation is complete, driving the motorhome back from storage for final checks is highly recommended.

This journey confirms braking performance and general road manners, while also providing access to power when you get back home for final checks.
Importantly, it allows time to rectify any emerging issues calmly rather than hurriedly on your day of departure.
16. The value of early preparation
Perhaps the most overlooked benefit of thorough preparation is psychological. Knowing that your motorhome has been checked, cleaned and tested builds confidence. That confidence transforms the touring experience, allowing you to focus not on potential faults, but on the pleasures of the journey ahead.
Preparation is part of the anticipation that enriches every trip.
One convenient way of getting around on tour is on two wheels. If you’re looking for a way to transport your bicycle to your chosen site, take a look at our guide to motorhome bike racks.
Lead image: Getty Images
Future Publishing Limited, the publisher of Practical Motorhome, provides the information in this article in good faith and makes no representation as to its completeness or accuracy. Individuals carrying out the instructions do so at their own risk and must exercise their independent judgement in determining the appropriateness of the advice to their circumstances. Individuals should take appropriate safety precautions and be aware of the risk of electrocution when dealing with electrical products. To the fullest extent permitted by law, neither Future nor its employees or agents shall have any liability in connection with the use of this information. Double check any warranty is not affected before proceeding.
If you’ve enjoyed reading this article, why not get the latest news, reviews and features delivered direct to your door or inbox every month. Take advantage of our brilliant Practical Motorhome magazine SUBSCRIBERS’ OFFER and SIGN UP TO OUR NEWSLETTER for regular weekly updates on all things motorhome related.
Leave a Reply